- Start by measuring the length of your RV’s roof. You’ll need to know how long your gutters need to be in order to cut them to size.
- Next, use a hacksaw to cut the gutters to the correct length.
- Once the gutters are cut to size, it’s time to install them. Begin by attaching the brackets that came with your gutters to the RV’s roof.
- Once the brackets are in place, slide the gutters into the brackets and tighten them down.
- That’s it! Your RV now has brand new aluminum rain gutters.
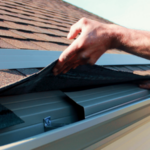
How do you replace RV rain gutters?
To install the new rain gutters, start at one end and use small screws or nails to attach the gutter to the RV. Work your way down the length of the RV, attaching the gutter as you go. Once you reach the end, trim off any excess gutter material. That’s it! In just a few minutes, you’ve successfully replaced your RV rain gutters and can now enjoy peace of mind knowing that your RV is better protected from water damage.
How to install Camco RV gutter spouts?
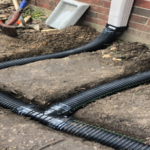
- Begin by planning where you would like your gutter spouts to be installed. It is important to ensure that the spouts will be properly draining water away from your RV.
- Use a drill to create pilot holes for the screws that will hold the gutter spouts in place.
- Affix the gutter spouts to the RV using the screws and washers provided. Make sure that the spouts are level and securely in place.
- Use silicone caulk to seal around the base of each gutter spout. This will help to prevent leaks.
- Test the spouts by running water from a hose over them. Check for any leaks and make adjustments as necessary.
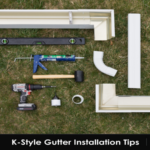
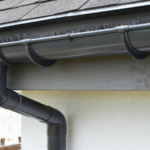
How do you install Aluminium rain gutters?
Installing aluminum rain gutters is a fairly simple and straightforward process. The first step is to measure the length and width of the area where the gutters will be installed. Once you have the measurements, you will need to cut the gutters to size. To do this, you will need to use a hacksaw or a power saw.
Next, you will need to install the brackets that will hold the gutters in place. The brackets should be placed at least every two feet. Once the brackets are in place, you can then start to install the gutters. To do this, you will need to slide the gutters into the brackets. Once the gutters are in place, you will need to secure them with screws.
Finally, you will need to install the downspouts. The downspouts should be installed at the end of each section of gutter. To do this, you will need to drill holes into the gutters. Once the holes are drilled, you can then screw the downspouts into place.
How do you attach Aluminium gutters?
- Select the type of hanger you will use. There are several different types of hangers available for attaching gutters. The most common type is the J-hook hanger, which is a J-shaped piece of metal with a hole in the center. Other types of hangers include the U-bolt hanger, the L-hanger, and the S-hook hanger.
- Measure the length of gutter you will need and cut it to size. Make sure to allow for any miters or end caps you will need.
- Install the hangers on the fascia board. The hangers should be spaced approximately 24 inches apart. Use screws or nails to secure the hangers in place.
- Hang the gutter on the hangers. Start at one end and work your way to the other. Make sure the gutter is level as you go.
- Secure the gutter in place. Use screws or nails to secure the gutter to the hangers. Start at one end and work your way to the other.
- Install the downspouts. Cut the downspouts to size and attach them to the gutters using screws or nails. Start at the top and work your way down.
- Install the end caps. Cut the end caps to size and attach them to the gutters using screws or nails.
Do it yourself gutter installation instructions?
- Before beginning any do-it-yourself gutter installation project, it is important to take measurements of the area you will be working on. This will ensure that you have all of the necessary materials on hand and that your finished product will fit properly.
- Once you have your measurements, you can purchase the gutters and any additional materials needed. Be sure to purchase gutters that are the correct size for your project.
- The next step is to install the brackets that will support the gutters. Begin by attaching the brackets to the fascia board, making sure that they are level and evenly spaced.
- With the brackets in place, you can now install the gutters. Start by attaching one end of the gutter to the bracket, then work your way along the length of the gutter until it is fully secured.
- Once the gutters are installed, you can add any additional finishing touches, such as end caps or drain pipes.
Do-it-yourself gutter installation is a relatively easy project that can be completed in a few hours. By following these simple instructions, you can have new gutters installed in no time.
How do you seal RV gutters?
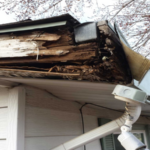
RV gutters are an essential part of keeping your rig in good shape. They help to keep water from pooling on your roof and causing leaks. sealing your RV gutters is a simple process that will help to extend the life of your rig.
To seal your RV gutters, you will need a tube of silicone sealant and a rag. Begin by cleaning out your gutters with a hose. Then, use the rag to wipe down the inside of the gutters, removing any dirt or debris. Next, apply a bead of silicone sealant to the inside of the gutter. Use your finger to spread the sealant evenly. Finally, allow the sealant to dry for 24 hours before using your gutters again.
Does Flex Seal really work on gutters?
According to the Flex Seal website, the product works as a sealant that can patch, coat, and stop leaks. The website also claims that Flex Seal can be used on gutters, but does not provide any specific instructions on how to do so. There are some user-generated YouTube videos that show people using Flex Seal on gutters, but it is difficult to say how well the product works in this application without seeing it in person.
Last Word
If you are looking for an easy and affordable way to install rain gutters on your RV, then aluminum rain gutters are the way to go. They are easy to install and can be found at most hardware stores. Be sure to follow the instructions carefully and take your time so that you can get the job done right.