- Start by measuring the length of your gutter. This will determine how many end caps you will need to purchase.
- Next, use a hacksaw to cut the end caps to the appropriate size.
- Once the end caps are cut to size, it’s time to install them. Begin by applying a generous amount of sealant to the underside of each end cap.
- Press the end caps into place and hold them there for a few minutes while the sealant dries.
- That’s it! Your plastic gutter end caps are now installed and ready to use.
How do you install a gutter end cap?
- Begin by measuring the end of the gutter to determine the size of the end cap needed.
- Cut the end cap to size, using a hacksaw or similar tool.
- Apply a bead of sealant or caulking around the edge of the end cap.
- Position the end cap over the end of the gutter, and press it into place.
- Nail or screw the end cap in place, using corrosion-resistant fasteners.
- Apply another bead of sealant or caulking around the perimeter of the end cap, for added protection against leaks.
How do you seal a gutter end cap?
- To seal a gutter end cap, you’ll need some sealant and a utility knife.
- Start by cutting a small hole in the end cap with the utility knife.
- Next, apply a generous amount of sealant to the end cap.
- Use your finger to spread the sealant evenly around the hole.
- Finally, press the end cap firmly onto the gutter and allow the sealant to dry.
How do you install plastic gutter guards?
To install plastic gutter guards, you will need to purchase the correct size and type of guard for your gutters. You will also need a ladder, drill, screwdriver, and screws. Once you have all of your materials, you will need to clean out your gutters to prepare for installation. Next, you will need to measure and cut the guards to fit your gutters. Once the guards are cut, you will need to drill holes in the guards and screw them into the gutters. Finally, you will need to test the guards to make sure they are properly installed and working correctly.
How do you rivet end cap gutters?
Riveting end cap gutters is a process of joining two pieces of metal together using rivets. Rivets are small metal pins that are inserted into holes in the metal and then hammered down to secure the two pieces together. This process is often used to join gutters together at the ends, creating a strong and secure connection.
To rivet end cap gutters together, first, align the two pieces of gutter so that the holes for the rivets line up. Then, insert a rivet into each of the holes. Hammer the rivets down so that they are flush with the surface of the gutters. This will secure the two pieces of gutter together.
If you are not familiar with the process of riveting, it is advisable to seek the assistance of a professional. Riveting is a specialized skill that requires knowledge and experience to do correctly. Hiring a professional to rivet your end cap gutters will ensure that the job is done correctly and that your gutters are securely attached.
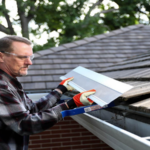
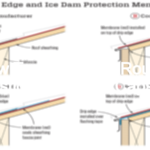
How do you install roof edge caps?
- Begin by pre-drilling holes into the edge of the roof.
- Next, apply a generous amount of sealant or adhesive to the back of the roof edge cap.
- Press the edge cap into place, making sure that it is flush with the edge of the roof.
- Use screws or nails to secure the edge cap in place.
- Finally, apply a bead of sealant along the edge of the cap to ensure a watertight seal.
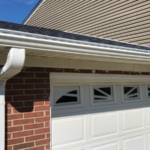
Do gutters need end caps?
Gutters do not need end caps, but they may be beneficial in some cases. End caps can help to keep leaves and other debris from entering the gutter system and clogging it. They can also provide a finished look to the gutters.
Conclusion
If you’re looking for an easy way to install plastic gutter end caps, then this is the article for you. We’ll go over all of the steps you need to take in order to get the job done quickly and easily.