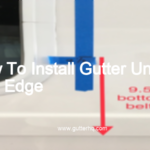
Cut the drip edge to size, using a hacksaw or power saw.
Install the drip edge by nailing it into the gutter, with the drip edge facing downwards.
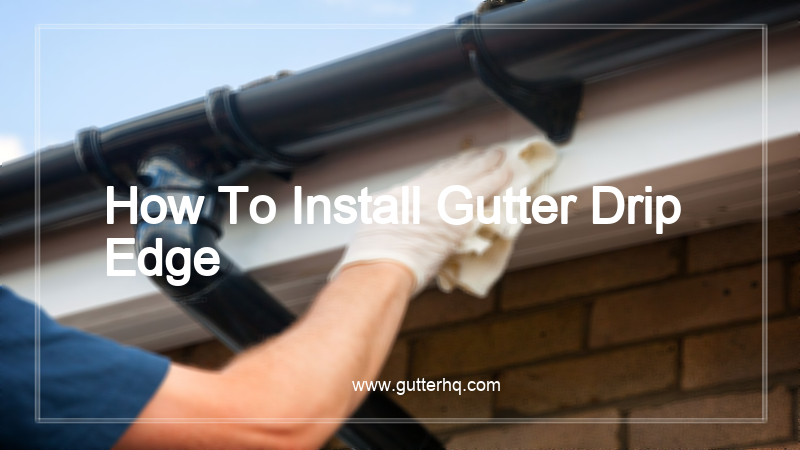
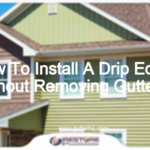
What is the proper way to install drip edge?
There are a few different ways that you can install drip edge, but the most common and most effective method is to install it under the shingles. This will ensure that the drip edge is properly protected from the elements and will also help to keep it in place.
How far below the drip edge should the gutter be?
There is no definitive answer to this question as it will depend on the specific situation and what works best for your home. However, a good general rule of thumb is to have the gutter be at least 2-3 inches below the drip edge. This will ensure that water can properly flow into the gutter and that there is no risk of the gutter becoming clogged.
If you live in an area with a lot of trees, you may want to have the gutter be even lower so that leaves and debris don’t have a chance to clog it up. You may also want to consider having a gutter guard installed to further reduce the risk of clogging.
Ultimately, the best way to determine the ideal height for your gutter is to experiment and see what works best for your home. Try different heights and see how well the gutters function. If you find that you’re constantly having to clean out the gutters or they’re becoming clogged frequently, it’s a good idea to lower the gutter so that it’s less likely to happen.
Do you install ice and water shield over a drip edge?
Most roofing contractors will install ice and water shield over a drip edge to help protect the edge of the roof from water damage. Ice and water shield is a self-adhesive membrane that is applied to the roof deck before the shingles are installed. The membrane is designed to keep water from seeping under the shingles and into the home.
How do you install drip edge after roofing?
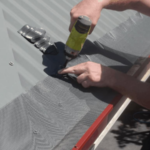
Begin by measuring the length of the drip edge. Cut the drip edge to size using a utility knife.
Next, use a hammer and nails to attach the drip edge to the lower edge of the roof. Make sure that the nails are driven into the sheathing for a secure hold.
Once the drip edge is in place, you can begin installing the roofing material. Start at the bottom of the roof and work your way up, overlapping each row of roofing material as you go.
When you reach the top of the roof, trim the excess roofing material flush with the drip edge. You may need to use a utility knife or a pair of tin snips to make a clean cut.
Should drip line holes up or down?
There is some debate over whether drip line holes should face up or down, but the general consensus is that they should face down. This is because water will more easily seep down through the soil and reach the roots of the plant when the holes are facing down. Additionally, gravity will help to keep the water in the soil near the roots of the plant, rather than allowing it to run off.
Final Word
If you’re looking to install a gutter drip edge, there are a few things you’ll need to keep in mind. First, make sure that you have the right tools for the job. You’ll need a tape measure, a level, a drill, and a saw. Second, you’ll need to make sure that you have the correct size drip edge for your gutters. Third, you’ll need to mark where you’ll be drilling holes for the drip edge. Fourth, you’ll need to drill the holes and then attach the drip edge. Finally, you’ll need to check that the drip edge is level and then secure it in place.
Should drip edge be nailed to fascia? A metal drip edge will help protect the sheathing under the roof, but if it's installed too closely to the fascia board, it can still cause water to be drawn into the fascia.…
Installing drip edge and gutter is a simple and easy process that anyone can do.You will need some basic tools and materials including a level, tape measure, hacksaw, and screws.Begin by measuring the length of your gutter and cutting the…
Begin by measuring the length of your gutter. You will need to purchase a gutter drip edge that is slightly longer than your gutter.Cut the drip edge to size with a hacksaw.Install the drip edge onto the gutter by nailing…
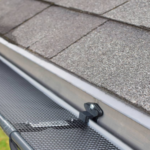
You can install gutter apron over drip edge as long as the drip edge is properly installed and in good condition. The apron will help to protect the drip edge from getting clogged with debris and will also help to…
Most roofers will install drip edge on your home if you request it. Drip edge is a metal flashing that helps to keep water from seeping under your shingles and causing damage to your roof deck or home interior. Should…
How far below the drip edge should the gutter be? There is no definitive answer to this question as it depends on a number of factors, such as the type of roof, the climate, and the amount of rainfall. However,…
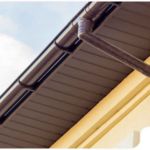
drip edge is not installed OVER the gutter, but rather underneath it. The drip edge is installed so that the edge of the metal is even with the outside edge of the gutter. The gutter is then installed on top…
Begin by measuring the length of your gutter run. You will need one piece of drip edge for each gutter section.Cut the drip edge to size using a hacksaw or power saw.Install the drip edge onto the gutter run, starting…
Measure the length of your gutter run and cut the gutters to size.Install hangers at the appropriate intervals along the length of the gutter.Suspend the gutters from the hangers and position them so that the lip of the gutter is…
Can drip edge be installed later? Yes, drip edge can be installed later, but it is not recommended. Drip edge should be installed when the roof is being installed to ensure that it is properly installed and does not cause…
Remove any old drip edge and clean the surface.Make sure the new drip edge is the same size and shape as the old one.Nail the new drip edge in place with the nails provided.Make sure the drip edge is properly…
To install a rain gutter with a drip edge, you will need a few tools and materials. A level, tape measure, drill, saw, and screws are required. You will also need to purchase the rain gutter and drip edge from…
Begin by removing any old drip edge that is already on the gutter. This can be done with a utility knife or a screwdriver.Next, measure the length of the gutter and cut the drip edge to size. Make sure to…
Begin by measuring the length of your home’s eaves. This will determine how much gutter material you’ll need to purchase.Next, install the gutter hangers along the length of the eaves. Be sure to space them evenly.Once the hangers are in…
Begin by removing any dirt or debris from the surface of the gutter using a putty knife.Next, use a measuring tape to measure the length of the gutter.Cut a piece of drip edge to the same length as the gutter,…
Begin by measuring the length of your gutters.Cut the drip edge to size using a hacksaw or tin snips.Install the drip edge by nailing it into the front lip of the gutter.Make sure the drip edge is installed flush with…