Aluminum gutters are a vital component of your home, guiding rainwater safely away from your foundation. Yet, like any other part of your home, they can develop issues over time, particularly leaks. Addressing these leaks promptly is crucial to maintaining the structural integrity of your home and preventing costly repairs down the road.
Key Takeaways
- Regular inspections can help identify leaks early, preventing water damage to your home.
- Common causes of leaks include clogs, corrosion, and joint separation.
- Simple tools like a hose and flashlight can aid in detecting gutter leaks.
- Repairing leaks involves cleaning, sealing, and possibly replacing gutter sections.
- Preventive maintenance, such as regular cleaning and trimming nearby trees, extends gutter life.
Why Aluminum Gutters Leak and Why It Matters
Aluminum gutters are popular due to their durability and lightweight nature. However, they aren’t immune to the effects of weather, debris, and time. Leaks in these gutters can lead to serious problems, such as water damage to your home’s exterior and foundation. Most importantly, neglecting these issues can escalate repair costs significantly.
Impact of Leaky Gutters on Home Maintenance
When gutters leak, the water they should direct away from your house instead seeps into the ground around your foundation. This can cause soil erosion and lead to basement flooding. Over time, this unchecked water exposure can weaken the foundation and cause cracks. Besides that, moisture can damage siding and invite mold growth, affecting both the structure and health of your home.
Common Culprits Behind Aluminum Gutter Leaks
Several factors can contribute to leaks in aluminum gutters. Clogs from leaves and debris are a frequent cause, blocking water flow and creating overflow points. Corrosion, although less common with aluminum, can occur, particularly in older systems. Additionally, the joints and seams where gutter sections connect are susceptible to separation over time, especially if not sealed properly.
Signs Your Gutters Might Be Leaking
Spotting a gutter leak early can save you from more extensive repairs. Look for water stains on the exterior walls of your home, which indicate water overflow. If you notice peeling paint or rust spots on the gutters themselves, these could be signs of leaks. Moreover, puddles of water around your foundation after a rainstorm are a strong indicator that your gutters aren’t functioning properly.
Steps to Identify Gutter Leaks Quickly
Identifying leaks in your aluminum gutters is the first step to fixing them. By employing a few straightforward techniques, you can pinpoint problem areas effectively and efficiently.
Simple Visual Inspection Techniques
Start with a visual inspection. Walk around your home and look up at your gutters. Check for visible damage, such as cracks or separations, especially around joints. Use a flashlight to inspect the interior of the gutters for clogs or corrosion. A pair of binoculars can be handy for examining high areas without needing a ladder.
Testing for Hidden Leaks
Sometimes leaks aren’t immediately visible. To find these, run water through your gutters using a garden hose. Begin at the end opposite the downspout and slowly work your way towards it. Watch for drips or streams of water coming from areas other than the downspout, which can reveal hidden leaks.
Using Water to Locate Leaks
Besides using a hose, you can also test for leaks by observing during a rainstorm. This natural test allows you to see your gutters in action. Pay attention to any areas where water spills over the sides or drips through seams. Mark these areas for repair once the weather clears.
Materials and Tools You’ll Need
Before diving into the repair process, gathering the right materials and tools is essential. This ensures a smooth workflow and effective results. Here’s what you’ll need:
- Ladder: A sturdy, stable ladder to reach your gutters safely.
- Garden Hose: Useful for cleaning and testing the gutters.
- Bucket and Trowel: For removing debris and sludge.
- Gutter Sealant: A waterproof sealant specifically for gutters.
- Caulking Gun: To apply sealant accurately.
- Gutter Patches: For repairing larger holes.
- Sandpaper: To smoothen surfaces before sealing.
- Protective Gloves and Goggles: For safety during the cleaning and repair process.
Cleaning Gutters for Repair
Cleaning is a crucial step before making any repairs. Start by positioning your ladder securely against the house. Using a trowel, scoop out leaves, twigs, and any other debris from the gutters, depositing them into a bucket. Once the bulk of the debris is removed, use a garden hose to flush out any remaining dirt. This step not only clears the gutters but also helps identify any hidden leaks or cracks that need attention.
Patching Up Small Holes and Cracks
Once your gutters are clean, it’s time to address small holes and cracks. Begin by drying the area thoroughly; moisture can prevent sealants from adhering properly. Use sandpaper to smooth the edges around the hole, which helps the patch or sealant bond more effectively. Next, apply a layer of gutter sealant over the hole. For larger holes, you may need to use a gutter patch. Cut the patch to size, apply it over the hole, and cover it with sealant to ensure a watertight fix.
Remember, the key to a successful patch is ensuring that the edges are sealed completely. This prevents water from seeping under the patch and causing future leaks.
Sealing Joint Leaks and Applying Caulk
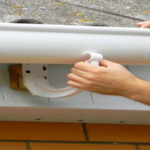
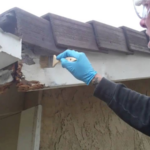
Joint leaks are a common issue with aluminum gutters, especially where sections meet. To fix these, first, remove any old caulk or sealant from the joints using a putty knife. Clean the area thoroughly to remove any dirt or residue. Once clean and dry, apply a generous bead of gutter sealant along the joint using a caulking gun. Press the sections together firmly and smooth the sealant with your finger or a tool to ensure a tight seal.
Replacing Sections for Severe Damage
If a section of your gutter is beyond repair, replacing it may be the best option. Start by measuring the damaged section and purchasing a replacement piece of the same size and type. Remove the damaged section by detaching it from the adjoining pieces. Install the new section by aligning it properly and securing it with screws or clips as per the original setup. Finally, apply sealant to the joints to ensure they are watertight.
Preventive Maintenance for Longevity
Preventing future leaks and prolonging the life of your aluminum gutters involves regular maintenance. By incorporating these simple practices into your routine, you can keep your gutters in top shape.
Regular Cleaning Schedule
To prevent clogs and leaks, establish a regular cleaning schedule. Aim to clean your gutters at least twice a year, ideally in spring and fall. However, if you live in an area with many trees, you might need to clean them more frequently. Regular cleaning prevents debris buildup and ensures water flows smoothly through the system.
Consider investing in gutter guards if you find yourself cleaning too often. These covers can reduce the amount of debris that enters your gutters, making maintenance easier.
Weatherproofing and Protective Measures
Weatherproofing your gutters can help them withstand harsh conditions. After cleaning, inspect your gutters for any signs of wear or damage. Apply a protective coating to the exterior of the gutters to prevent rust and corrosion. Additionally, ensure that all seals are intact and joints are properly caulked to prevent leaks.
Keeping Trees Trimmed to Prevent Obstruction
Trees can be a significant source of debris, especially during fall. To minimize this, keep any trees near your home trimmed. This reduces the number of leaves and twigs that fall into your gutters. Not only does this help prevent clogs, but it also reduces the frequency of cleaning, saving you time and effort.
Ensuring Your Gutter Repair is Effective
After you’ve completed the repairs on your aluminum gutters, it’s crucial to ensure that your efforts have been successful. Testing and regular inspections can confirm that your gutters are now leak-free and functioning as they should.
Testing Repairs with Water
One of the simplest ways to test your repairs is by using water. Grab your garden hose and run water through the gutters, starting from the end opposite the downspout. Watch closely for any signs of leakage at the repaired areas. If the water flows smoothly and exits through the downspout without any drips along the way, your repairs have likely been successful.
If you notice any leaks, you may need to apply additional sealant or patching material. It’s better to address these issues now rather than waiting for the next rainfall, which could lead to water damage.
Periodic Inspections Post-Repair
Regular inspections after your initial repair work can help catch any developing issues before they become significant problems. Aim to inspect your gutters every few months, especially after severe weather. Check for signs of wear, new leaks, or clogs that could compromise your gutter system.
Considering Professional Assistance
Sometimes, despite your best efforts, a leak might persist, or you might discover extensive damage that requires more than a DIY approach. In these cases, it’s wise to consult a professional. Experienced gutter repair specialists have the tools and expertise to address complex issues efficiently and can offer solutions that might not be apparent to the average homeowner.
Frequently Asked Questions (FAQ)
When dealing with aluminum gutters, several common questions arise. Here, I’ll address a few to help you better understand your gutter system and its maintenance.
How often should aluminum gutters be inspected?
Aluminum gutters should be inspected at least twice a year, typically in the spring and fall. However, if you live in an area with heavy rainfall or lots of trees, more frequent inspections might be necessary. Regular checks help catch potential issues early, reducing the risk of leaks and other damage. For more on gutter maintenance, learn why gutters are needed around the entire house.
Example: “After a particularly harsh winter, I checked my gutters in early spring and found that ice had caused some separation at the seams. A quick application of sealant fixed the issue before the rainy season started.”
What are the best materials for patching gutter leaks?
The best materials for patching gutter leaks include aluminum gutter patches, waterproof sealants, and specialized gutter caulk. These materials are designed to withstand the elements and provide a durable, long-lasting repair. When choosing a sealant or caulk, look for products specifically labeled for outdoor use to ensure they can handle temperature fluctuations and moisture. For more guidance on gutter maintenance, you might consider reading about how gutters should be positioned.
Can gutter leaks cause damage to my home foundation?
Yes, gutter leaks can lead to significant damage to your home’s foundation. When gutters leak, water can accumulate near the base of your home, leading to soil erosion and potential foundation cracking. Over time, this can result in costly repairs and structural issues. Keeping your gutters in good repair is crucial to protecting your home’s foundation.
Is it necessary to paint aluminum gutters after repair?
Painting aluminum gutters after repair is not always necessary, but it can be beneficial. Painting can provide an extra layer of protection against corrosion and enhance the aesthetic appeal of your home. If your gutters are visible and you want them to match your home’s exterior, consider using a high-quality exterior paint that is suitable for metal surfaces.
In conclusion, maintaining your aluminum gutters is essential to prevent leaks and protect your home from water damage. By following the steps outlined in this article, you can effectively identify, repair, and prevent gutter leaks, ensuring your home remains safe and dry.

